First, try to fix it with paint.
The kit chrome would not strip even with bleach, so it was sanded away and the surface rebuilt from the primer up. Heat colors were layered over bright silver to move the finish closer to the real titanium exhaust.
 JP
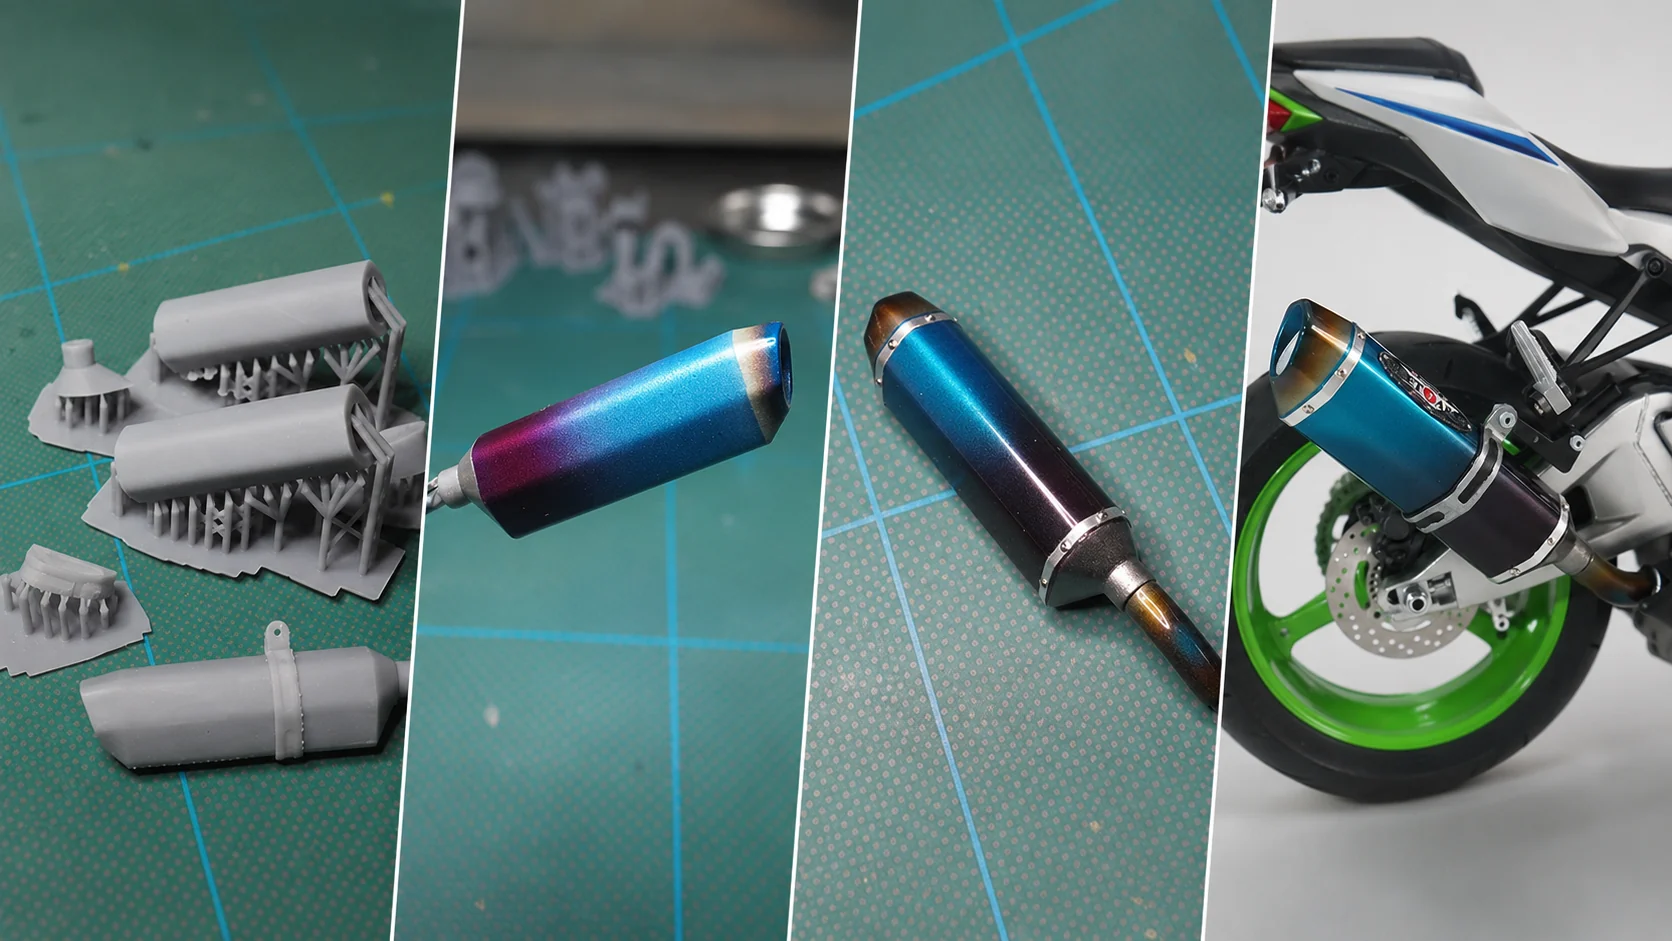
JPRepainting the kit exhaust was not enough to capture the real bike’s shape and heat discoloration. Using reference photos, real-bike measurements, and official images, I redesigned the exhaust in CAD and refined it through roughly ten prototypes and paint tests for a 1/9 model.
01 / START
The kit chrome would not strip even with bleach, so it was sanded away and the surface rebuilt from the primer up. Heat colors were layered over bright silver to move the finish closer to the real titanium exhaust.
The exhaust was modeled in CAD from photos and measurements supplied by the owner. Model-scale thickness, paint build, and sanding access were considered, and the bands and brackets were separated into individual parts.
02 / PROCESS
Compare real-bike photos, measurements, and official images to identify the key dimensions and visual features.
Build the geometry so the measurements remain consistent while also checking how the shape reads at model scale.
Check printing, test fit, sanding access, and paint thickness through roughly ten prototype iterations.
Make the front and rear bands and bracket separate pieces so surface preparation and painting remain practical.
Spray yellow, red, blue, and transparent clear layers in sequence to build the gradient without losing gloss.
03 / FINDINGS
The gloss black and clear base had to be made very smooth, then the bright metallic layer built up gradually in small amounts.
The narrower the heat-color boundary was sprayed, the more easily the surface lost gloss. Alternating color and transparent clear helped preserve the finish.
With a one-piece print, paint built up too heavily around the bands. Considering sanding and painting access, separating the parts was the more practical design.
04 / LINKS
The main article covering CAD design, prototypes, part separation, metallic finish, and heat-stain painting.
READ BUILD LOG [JP] ↗BEFOREAn earlier article where the stubborn chrome was sanded off and heat staining was tested on the kit exhaust.
READ BUILD LOG [JP] ↗GALLERYFinished photos show the custom exhaust installed on the bike, including the outlet mesh and heat discoloration.
VIEW GALLERY [JP] ↗A model part is not finished simply because it prints to the intended dimensions. It also has to be sandable, paintable, and installable. This exhaust became a practical example of connecting CAD and 3D printing to real scale-model work.